Note: This is a copy of an article I posted on LinkedIn in June 2026.
I’m sure many of my fellow instructional designers have struggled with vibe coding. I share your pain. The endless prompting and re-prompting, the tedious wait between responses, and the hopeless feeling that the project will never be finished. Despite these irritants, I continue to push through vibe-coding projects because the result is usually worth the effort.
But a recent project reminded me why I fell in love with the vibe coding concept. Unlike previous slogs, this one came together in an effortless afternoon. The “secret sauce” didn’t have anything to do with prompts. Instead, I changed where the app lives. I stopped building for the cloud and brought everything local.
(Note: This is also my first GitHub project!)
Background
While playing with AI video tools, I followed common Internet advice to concentrate on getting good first and last frames for each video clip. If I supplied these two frames along with direction instructions (lighting, camera movement, character movement, dialog, sound effects, et cetera) then the AI model combines this information and returns the video clip. Here’s an example of first and last frame images, and the resulting video.
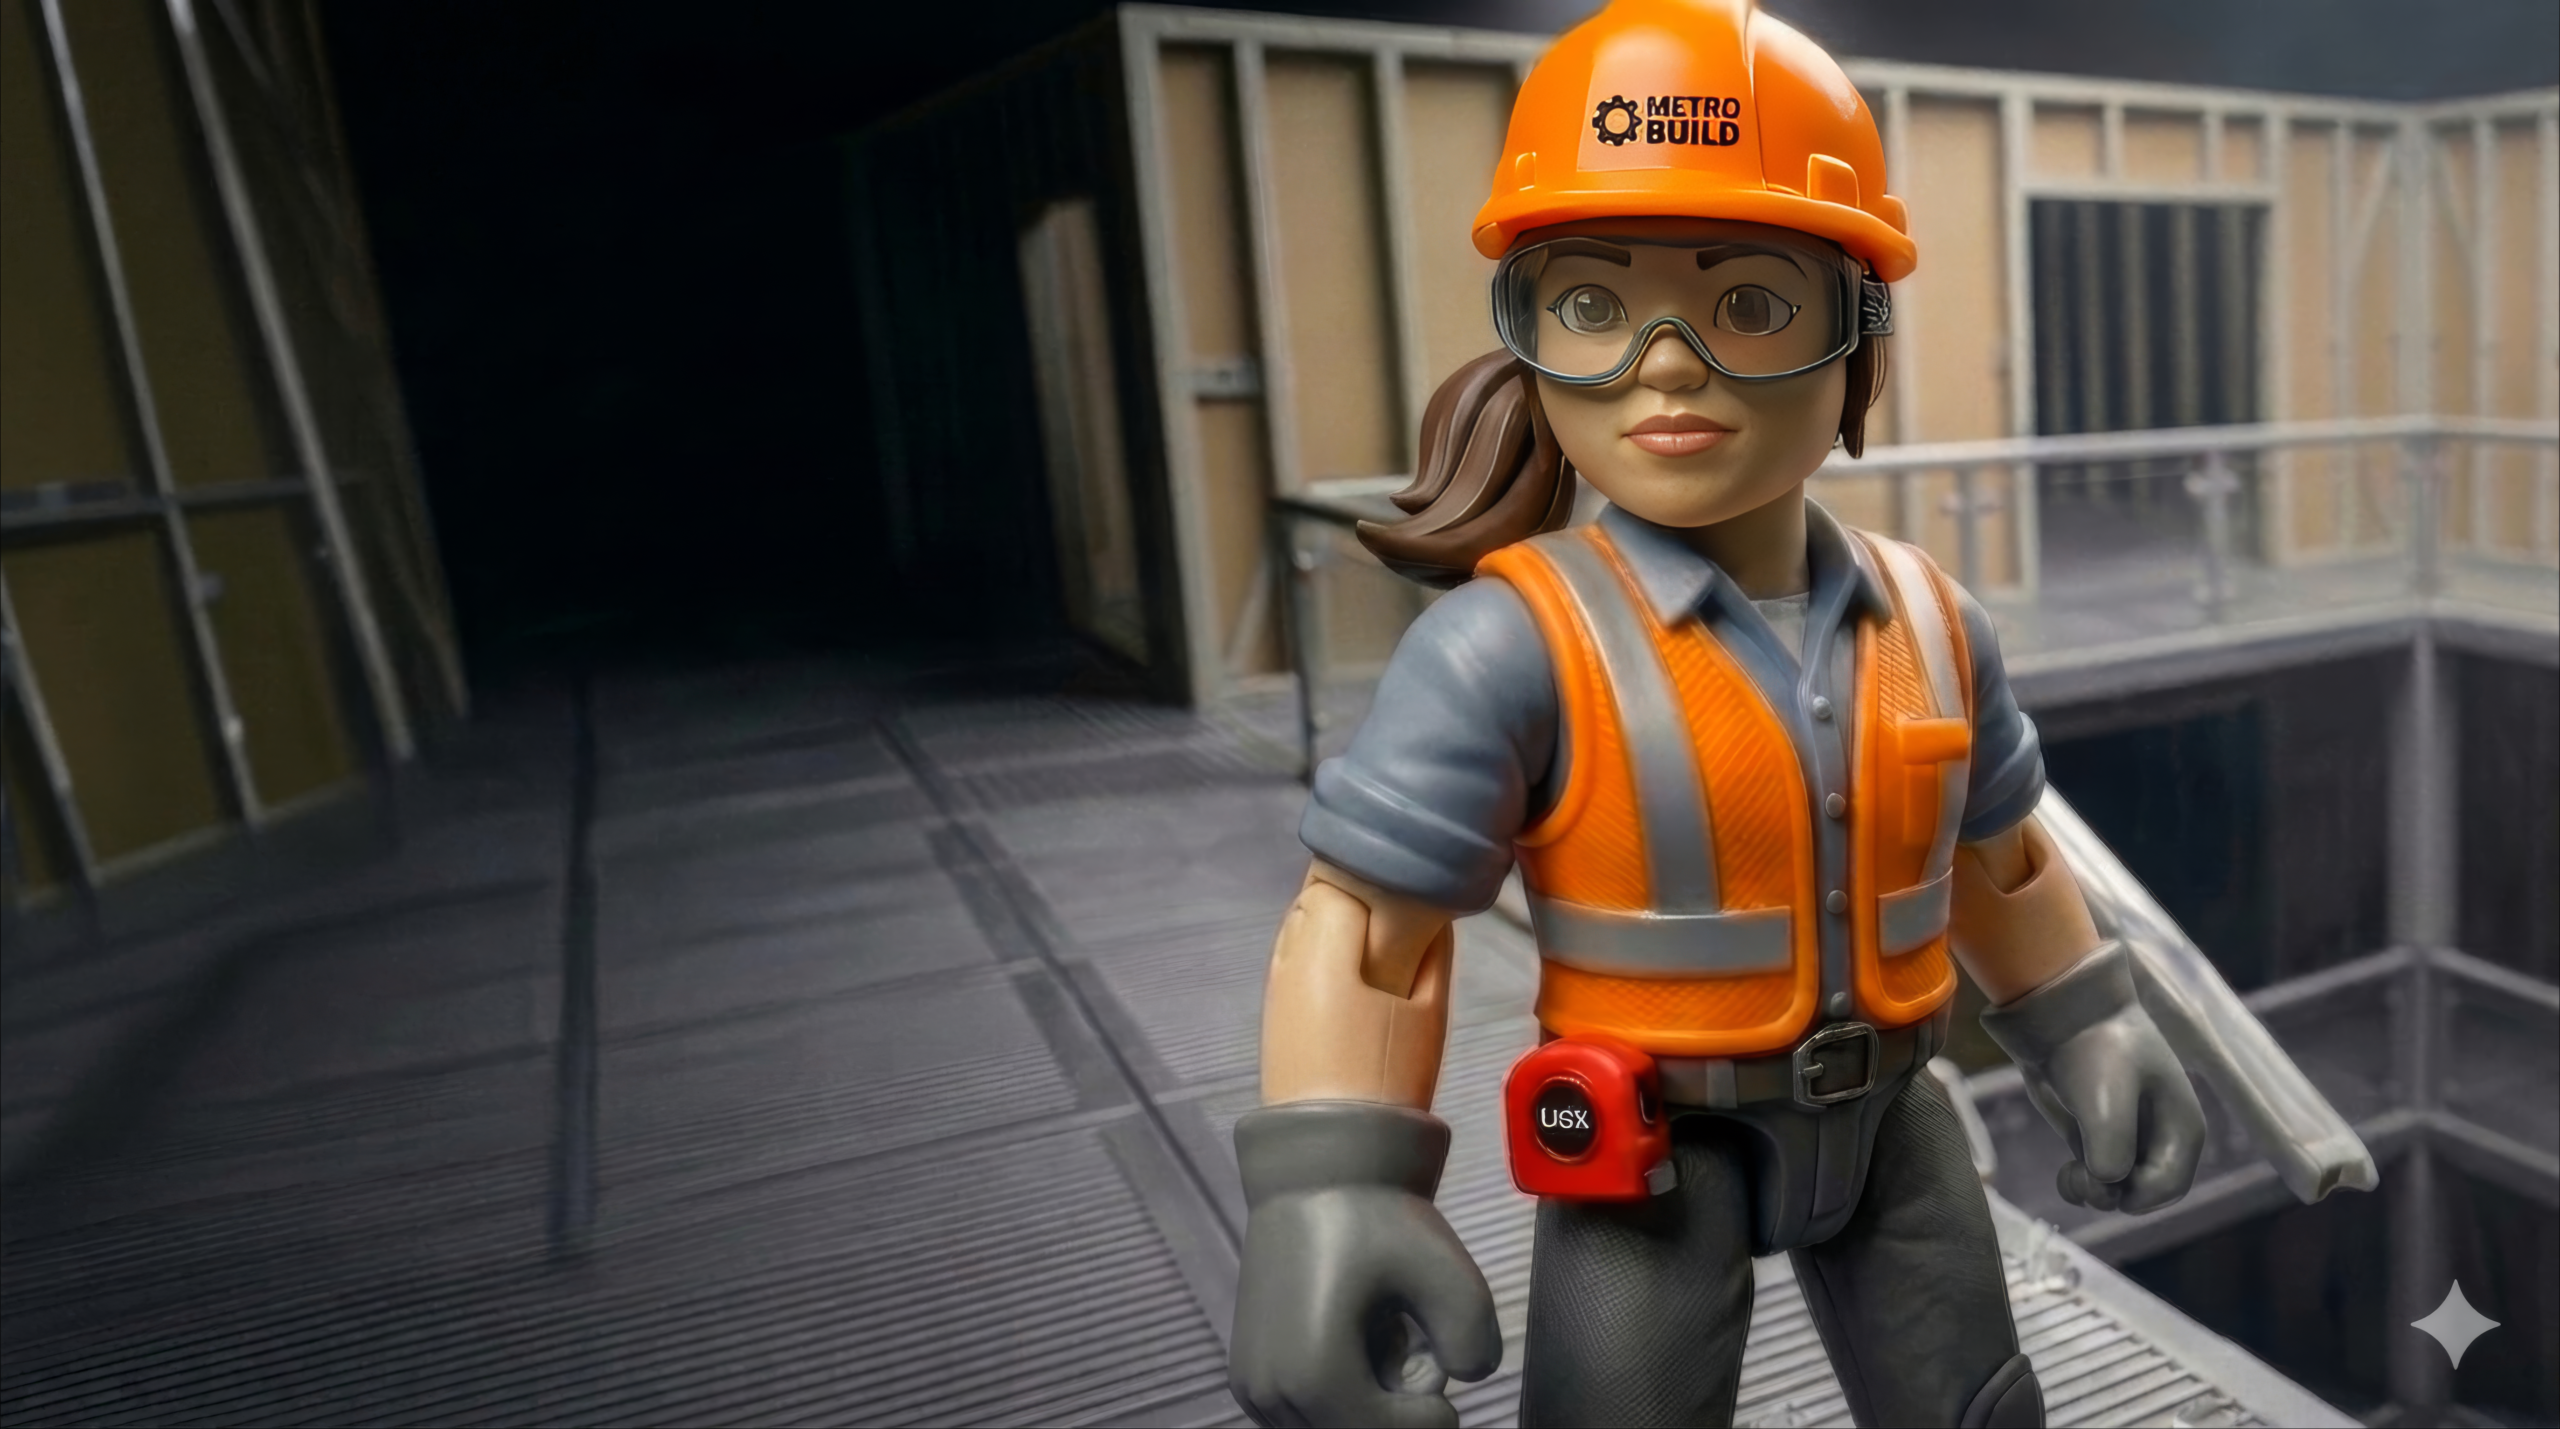

So, since the first and last frames are critical, it’s important to have consistent characters and locations across all the shots. The usual workflow is to create a starting image from a description in a generative AI model, then use that image as a “seed” to generate additional images. For example, if you want an over-the-shoulder shot of one character looking at another, you’d use a prompt like this:
“Cinematic over-the-shoulder shot. The camera is positioned closely behind [Foreground Subject/Character], looking past their shoulder to focus sharply on [Background Subject/Action]. Match the exact visual style, lighting, and color palette of the attached reference image. Depth of field with the foreground shoulder slightly blurred. [Optional: Add specific vibe or lighting, e.g., dramatic studio lighting, bright daylight].”
The AI Lift
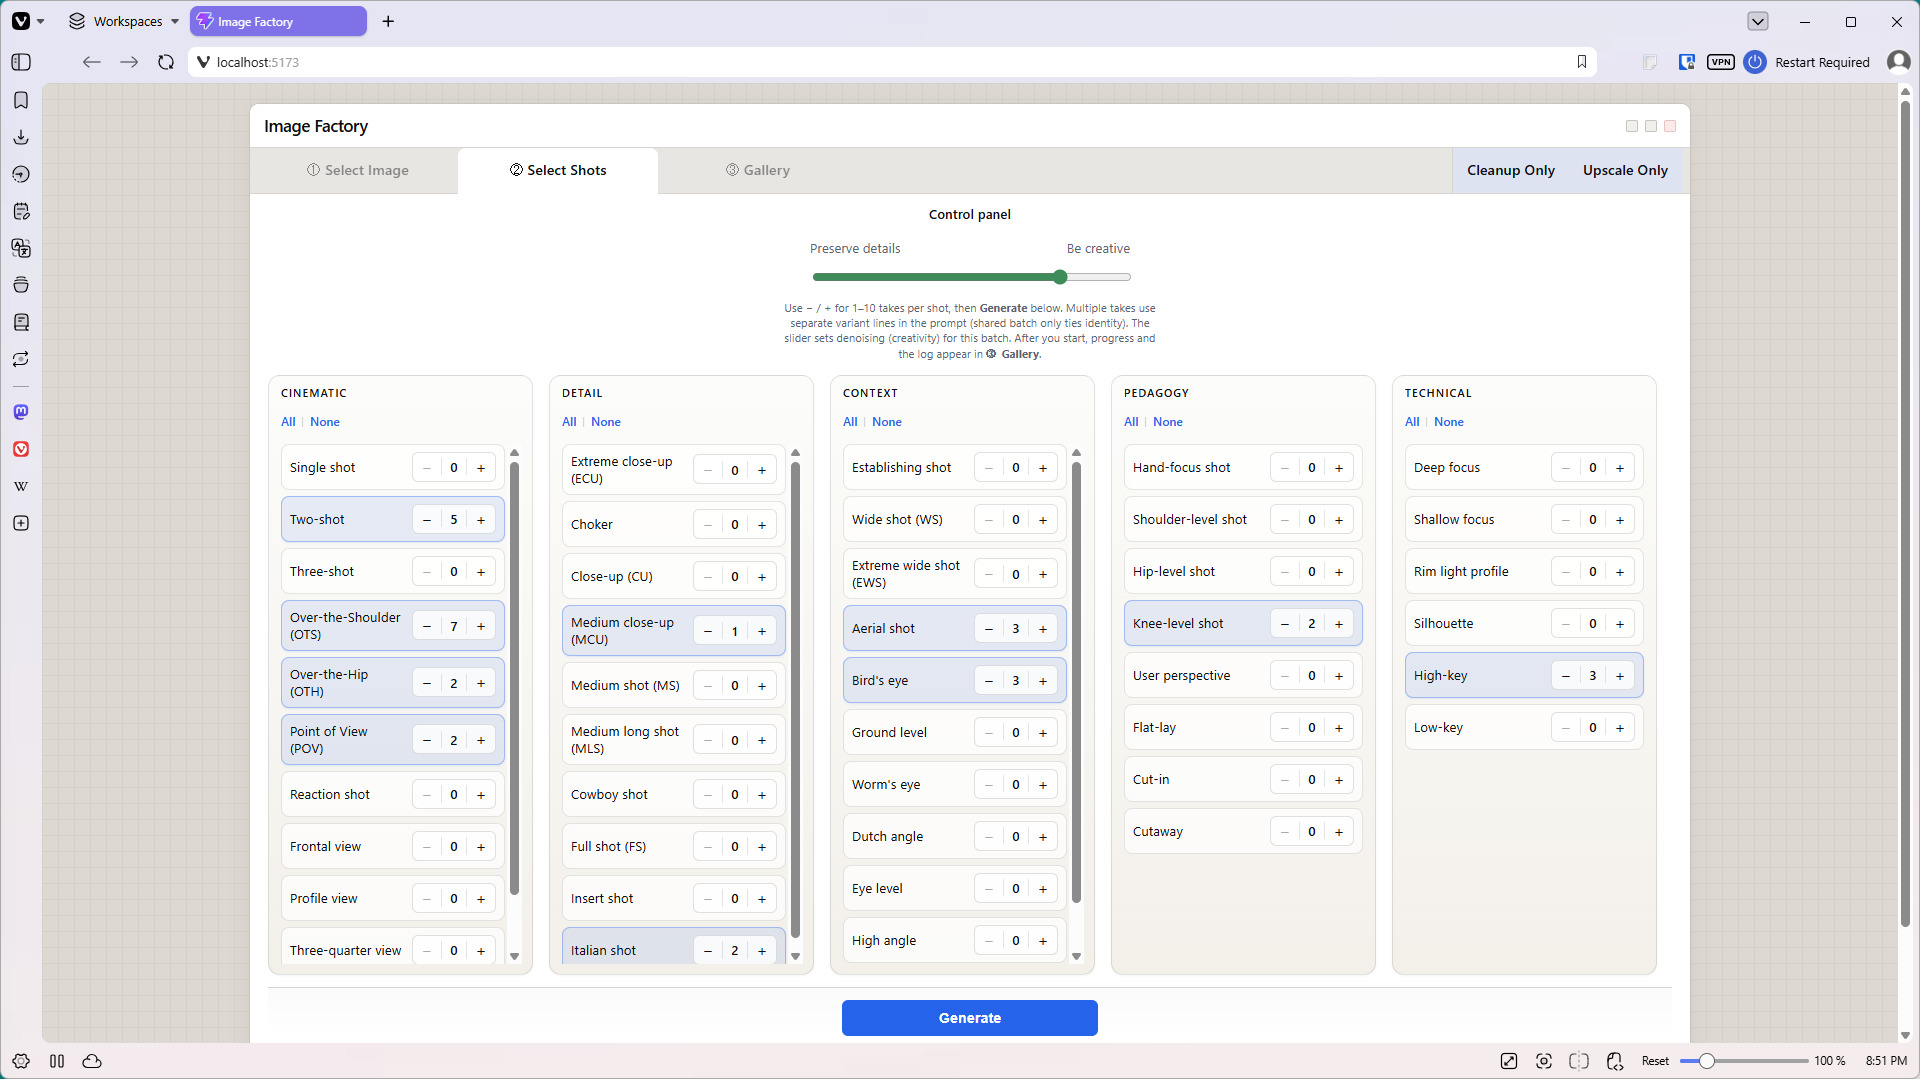
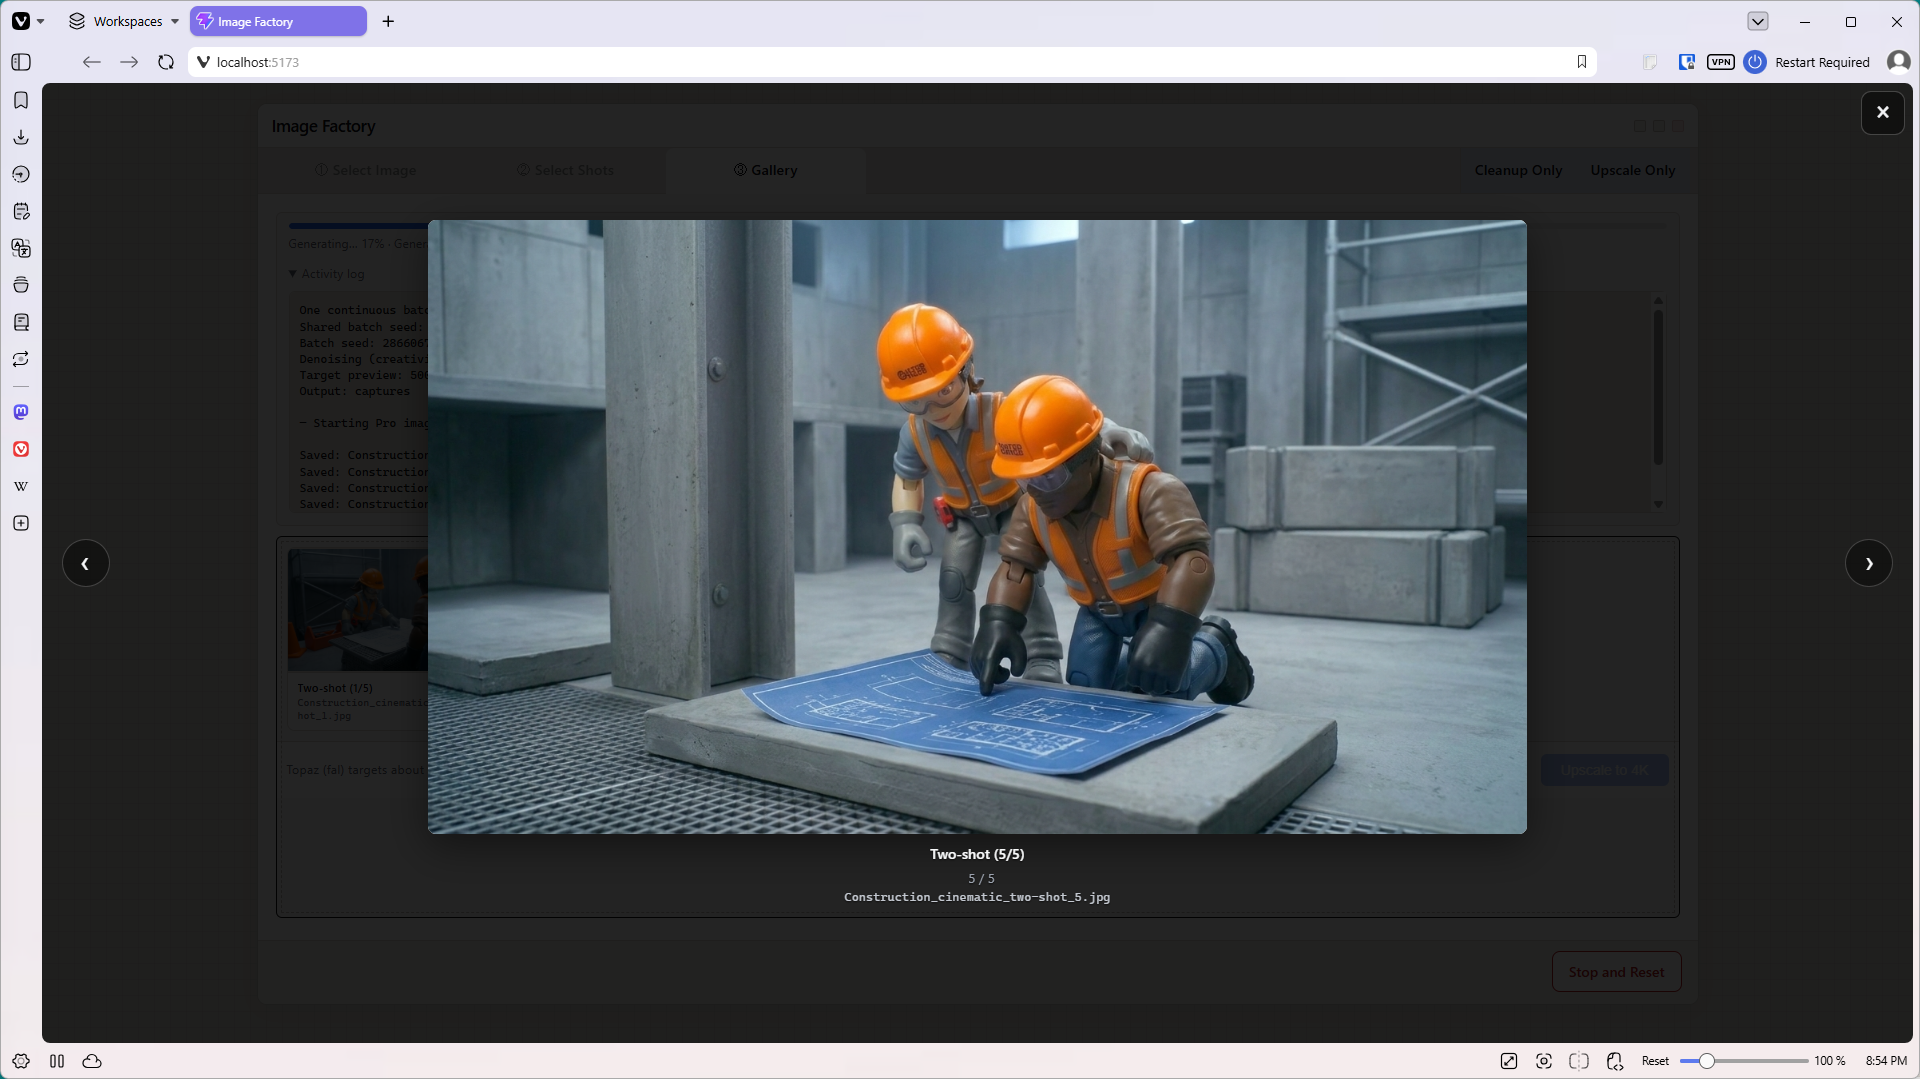
Gemini easily created additional prompts for other common cinematic shots, like a close-up, bird’s eye view, two-shot, or three-quarter view. I’d cut and paste the prompts as needed, customizing them on the fly to make sure they matched the mood and lighting of the seed image. And I’d repeat some prompts multiple times, because the first AI attempt didn’t match the vision in my head, or because AI made poor choices, or didn’t keep the characters consistent. So a lot of tedious cut-and-paste, trying to get shots that worked.
CTRL+C ➡️ CTRL+V, over and over and over.
So, after about three hours of cut/paste, I decided to vibe code a tool that would create multiple shots from one reference (aka seed) image.
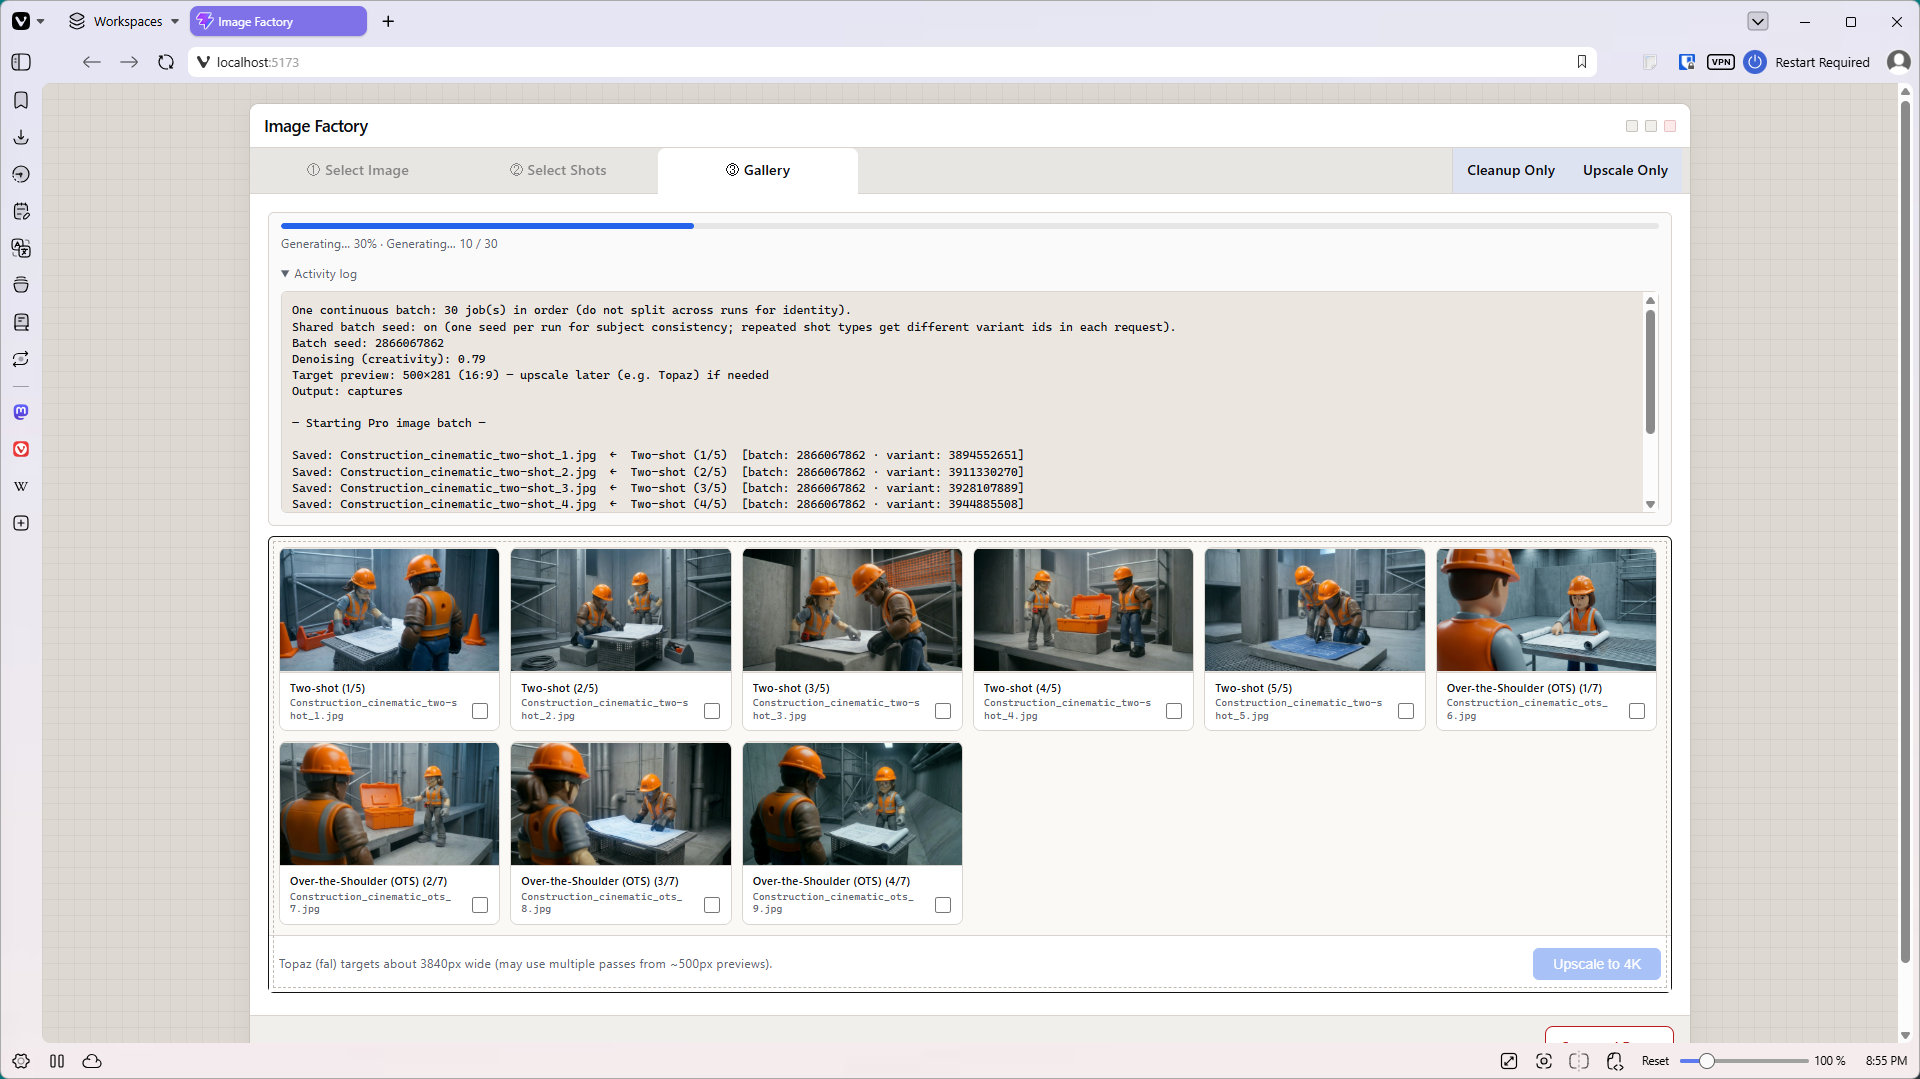
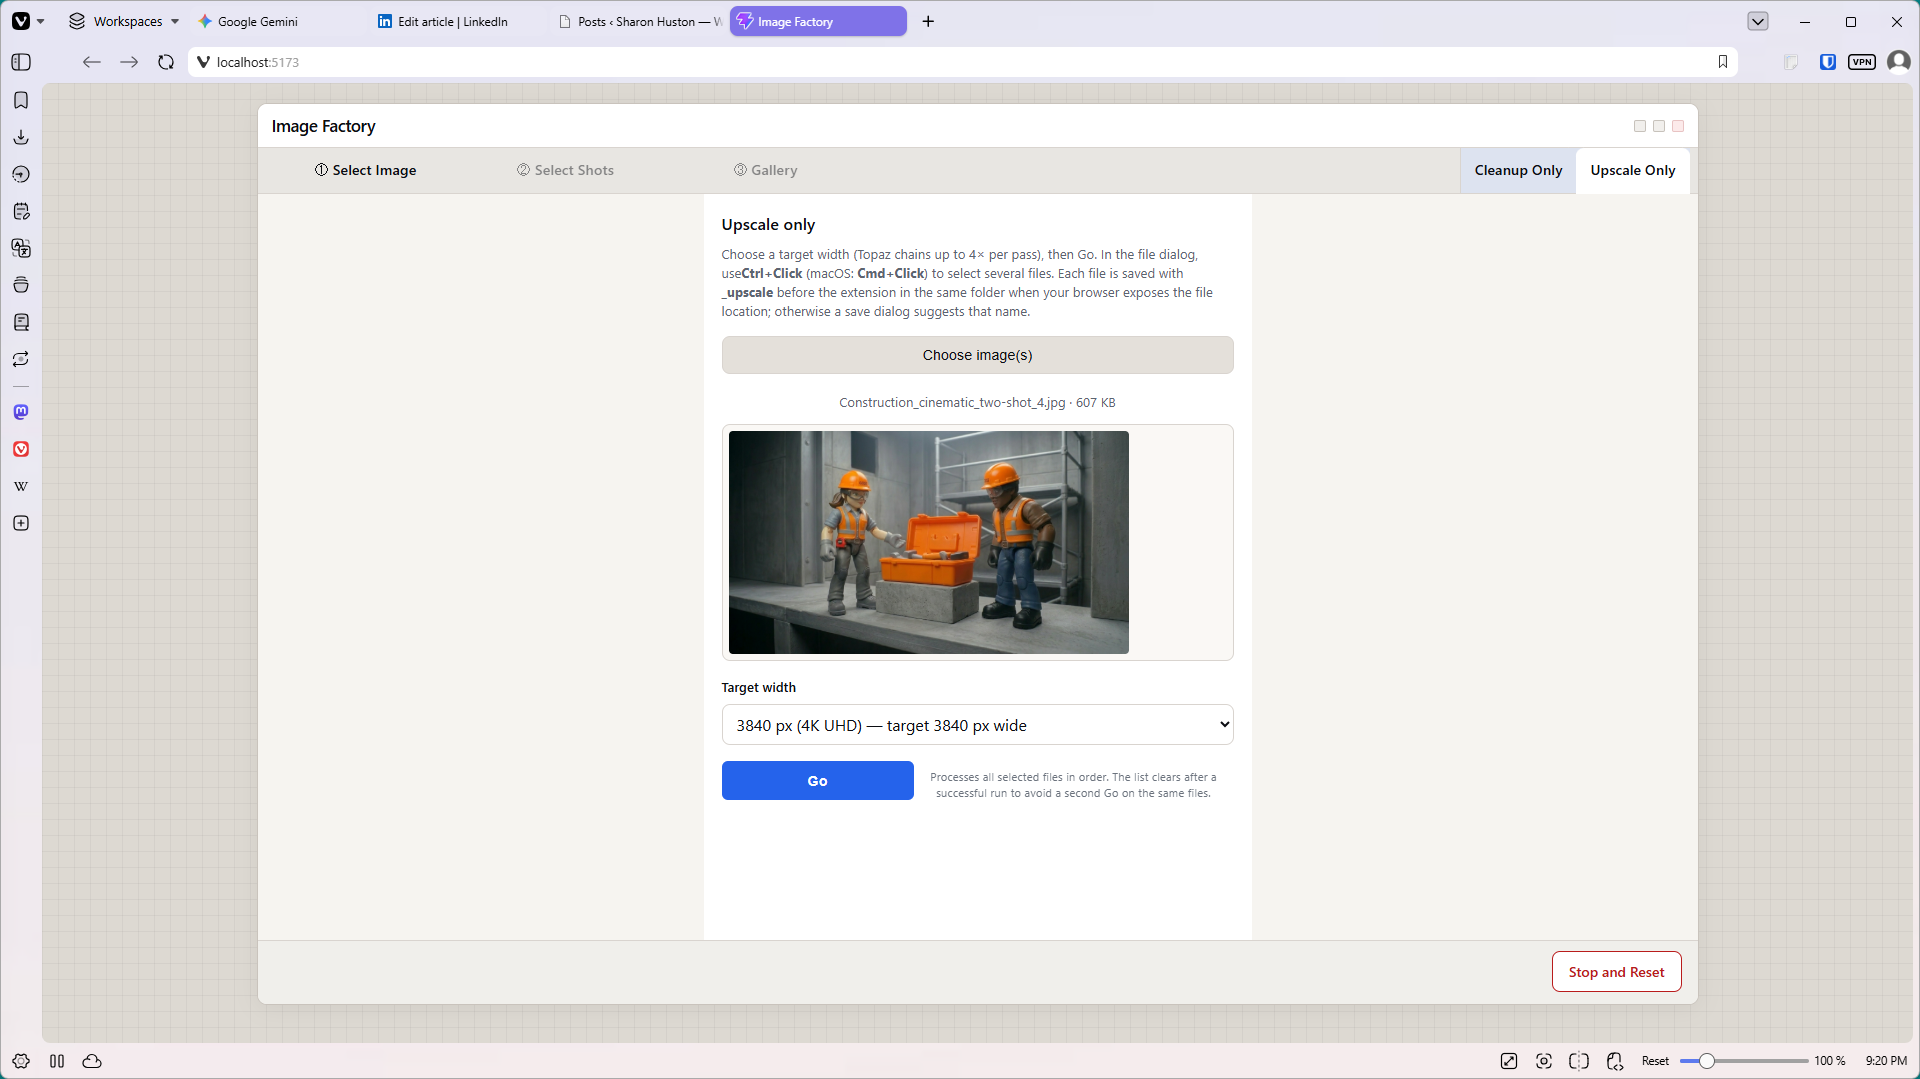
The finished app, ShotSmith, works on a “wizard” style workflow with three main tabs. First the user uploads an image. Next the user selects what type of shots they want, and how many of each shot they want to generate. (Up to ten shots per shot type). The last pane in the workflow features a gallery, where users can see the low-resolution resulting images. (Low resolution = less money.) They can open any image in a popup, then select their favorites to upscale to 4K.
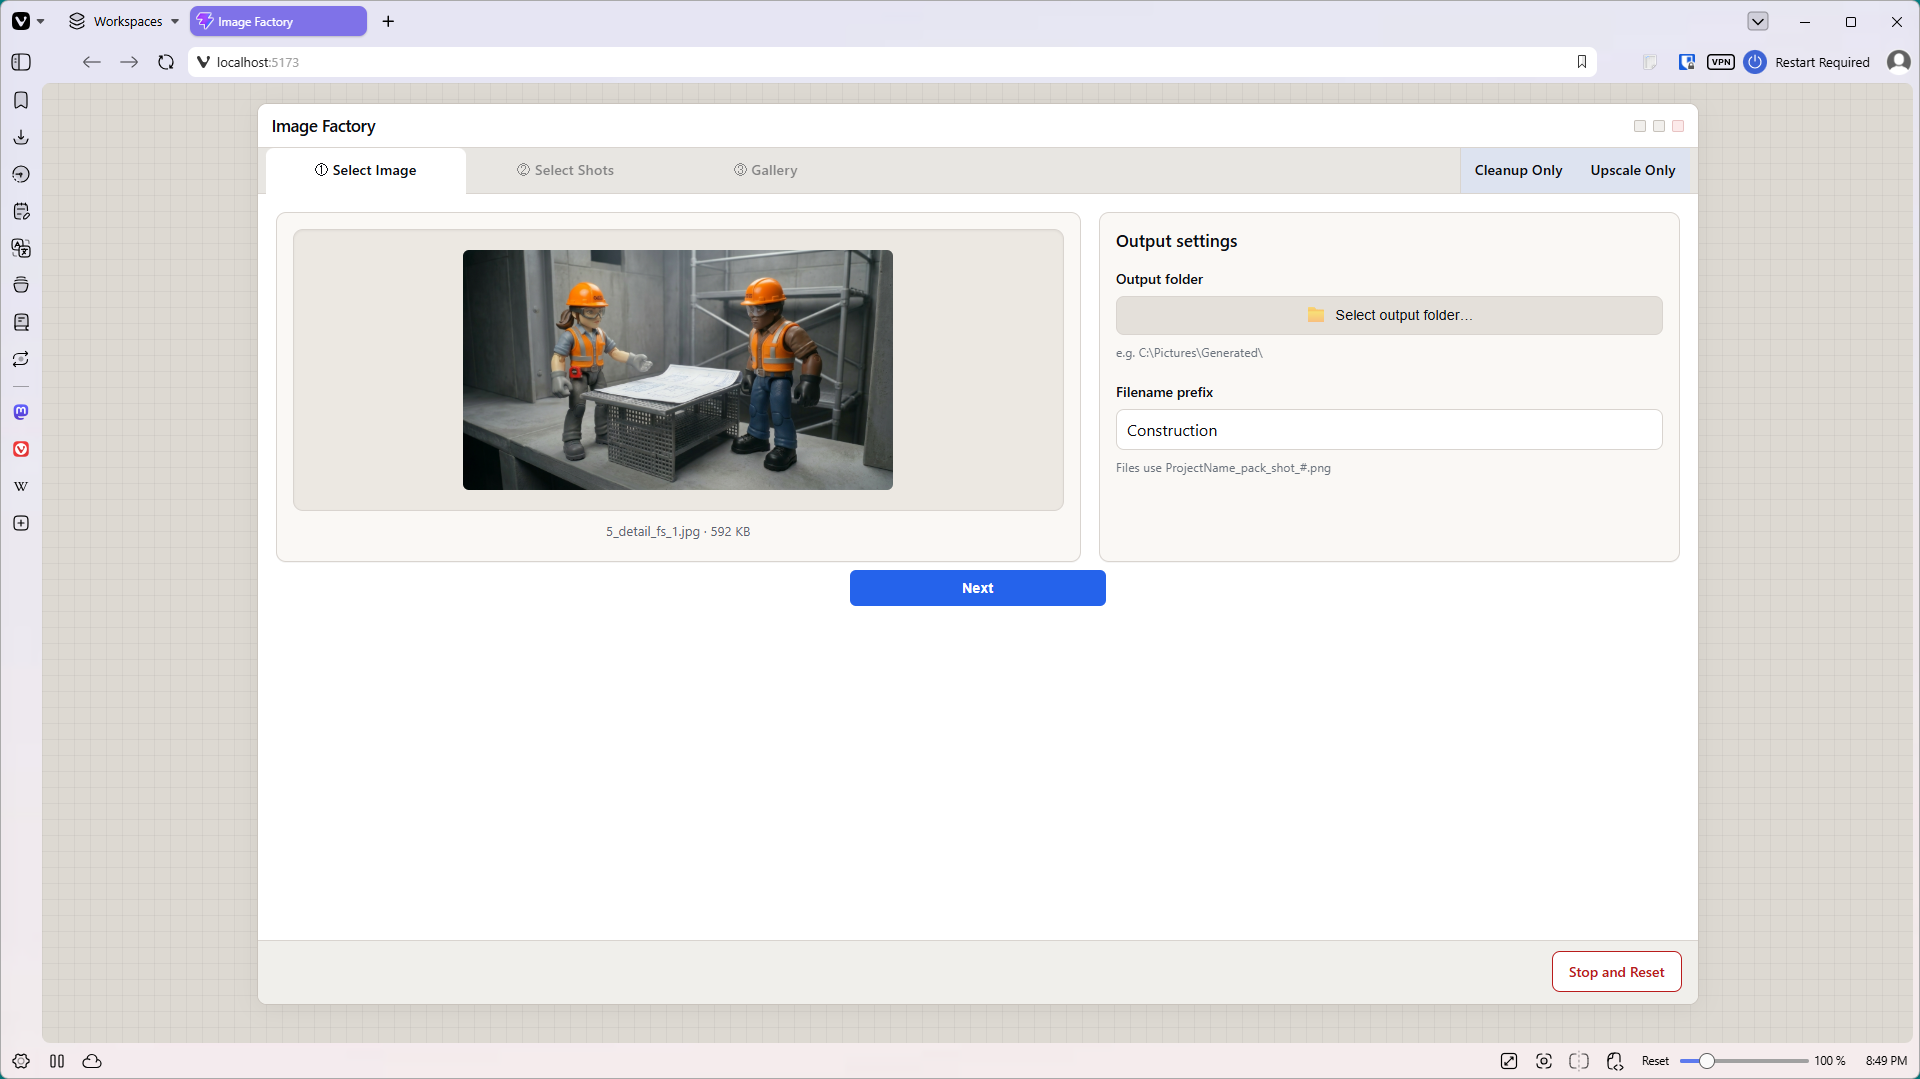
I also added two non-workflow tabs. The first tab uploads an image to Nano Banana and cleans it up. It removes scratches, fixes minor tears, balances color, and so on. If the image is historical, it’s careful to retain the vintage color cast. The second tab is a 4K upscaler for individually uploaded images.
The Freedom of Local Execution
So, at its heart, ShotSmith just serves up various prompts. There isn’t much logic, or many decisions to wrestle with. This simplicity made vibe coding easier, but it wasn’t the big change that made this project such an easy win.
Most of my previous vibe-coded projects were slower to develop because I defaulted to building web apps for the cloud. When you build for the cloud, your AI models have to wrestle with server space, database overhead, security compliance, and user session states. This lightweight project was a breath of fresh air because I stripped all of that away.
For example, in a typical web app, I’d have to validate every upload to make sure it didn’t contain code that could hijack my server and wreck my app. But in a local app, the user uploads their own images, so that risk disappears. Going local probably eliminated 80% of the back-end infrastructure code that can slow down project development.
My prior experience with JavaScript made Node.js a great choice for this project. JavaScript, as you may know, is a language designed to be used on a web page. Node.js lets users run JavaScript on their local machines, outside of the browser. Node.js provides the crucial access to the user’s hard drive. This makes everything easier. For example, the image gallery basically displays all the images in a folder. An online app would be harder to code – at a minimum, I’d have to keep track of which user generated which image, and make sure the app displays the correct images to the correct user.
Project Costs
Going local also affects the bottom line. I avoid server uptime fees, database use fees, and server storage costs. Generative AI sessions are my only expense.
Thanks to my safety helmet project, I already have a Google Cloud account. This gives me access to the Pro features, which Google recently restricted to paid-only accounts. I’m also using a new generative API platform, fal.ai, which gives me pay-as-you-go access to Topaz, a popular image upscale tool that turns the low-resolution Nano Banana images into high-quality 4K images.
Overall, the image generator is surprisingly affordable. Nano Banana’s Pro model generates 1367×768 images for $0.0398 per image. The image upscale process (which includes a quick image cleanup in Nano Banana) costs $0.065 per image—$0.035 for the cleanup, and $0.03 for the upscale. Because I only upscale about 1 in 10 images, my total cost for 100 images sits right around $4.63.
While the image generation phase of this project is surprisingly lean, the true cost of AI video workflows lies in the actual video generation. I’m planning a future article on that topic.
How is your team balancing the workflow friction of generative AI against the production value? If you’ve built your own local pipelines or micro-tools to beat the copy-paste fatigue, I’d love to hear about your setup in the comments below.